Archive for the ‘products’ Category
Head done and a little inworld test
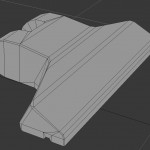
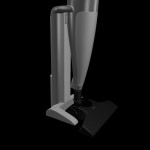
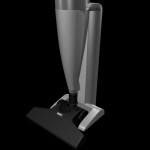
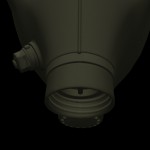
I rebuilt the vacuum head in LPM, I”ve probably been a little overkill on the triangle reduction, SL says L.I = 2 for the whole thing, that’s way better than what I expected.
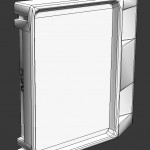
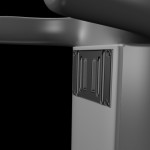
Room Control panel
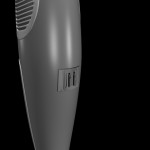
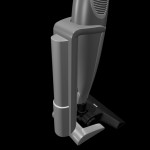
I whipped together this little wall panel to house the readouts for room status. It will show how “clean” the floor is, but could be expanded to show other aspects. I also got a lot of work done on the low polygon models for said panel and the vacuum cleaner body, these are 5-10 times lighter than the high-resolution counterpart.

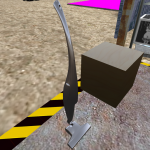
We now have indicators and a charging station!
I forgot to post yesterday so this is the first thing I’m doing today! I came up with a charging station design on monday and kinda followed up on it. It sort of match the vacuum cleaner design and I’m fairly happy with how it came out, considering it was a first draft. I added “connector plates” on the station and on the vacuum to give a little “this is where they connect” kind of feeling. It looks “OKAY” so far but all that really matter is how it will come out in the texture.
In the high polygon aspect of this product, only the wall control panel remains, and then I can start building the LPM mesh, unlike a lot of my earlier products, this one should be a breeze to block out, unwrap and texture. So unless something goes horribly wrong, i should be able to get to the scripting aspect of things before the end of the week.
On a sidenote, I’ve been playing a game called Shadowrun: returns which is a “modern” old-school isometric role-playing game, and they had a very interesting documentation about drawing new tiles for the game, especially how tiles should be textured, i invite you to read this wiki page, it’s very interesting stuff, and it makes me wonder about my reliance on CGI generated details in textures.
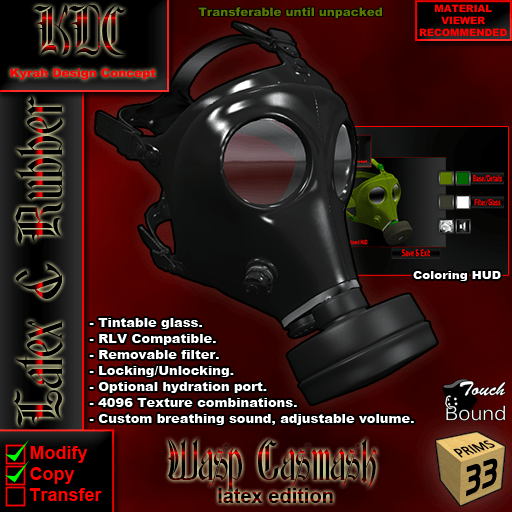
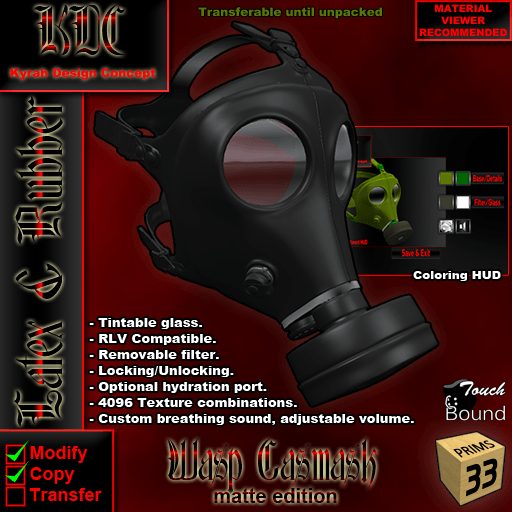
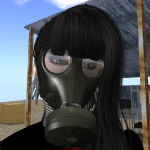
Second gasmask patch
I waited long enough for this one, I was expecting another bug to come up, but it has been long enough.
I’ took a breather the past few weeks, it was too hot to do anything good anyway. I started a new project, but there isn’t much to show yet.
And this is our first gasmask bugfix.
Two bugs fixed on this one, the first one is mine, improper colors on some of the HUD buttons.
The second one we have to thank linden labs for! apparently you cannot change the shape of a prim with a script placed inside of a mesh, SL thinks you are trying to change the shape of the mesh, and silently discards it. Instead of… you know, checking which object you are actually trying to change.
So I made a new root prim to the mask, fixed the lock scaling and updated the code that set the mask textures and it’s all good now, I hope.
You should receive the update sometime during the next 24 hours, enjoy 🙂
EDIT: I actually updated the sl wiki with the issue, feel free to make a jira, I’m not touching it anymore. https://wiki.secondlife.com/wiki/PRIM_TYPE
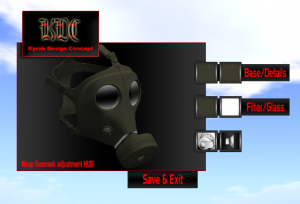
HUD sneak peek
I spent the past 10 days coding the gas mask, uploading textures, making sound effects… all those things i still have to do before release. If everything goes well, I should be able to do the release this weekend, or even today; who knows.
I now have a functional HUD, it is based on the format I’ve been using on most of my products and will allow to customize the following elements:
- The main body (face and straps).
- The plastic elements (filter mount, strap clips, exhaust valve).
- The filter.
- Tinting the glass.
- Enabling/Disabling the breathing sounds as well as adjusting it’s volume.
I’m not going to offer “one way mirror” glass for the lenses at this time, you are free to do it yourself should you want to, since the mask will be fully modifiable. The reason for this is that I want to set advanced material settings on the mask and there isn’t, a way to set and reset specularity parameters using a script, shiny has been packed into the specularity material parameters so I cannot set it without risking to overwrite the settings.
For this same reason there will be a “matte” version and a “glossy/latex” version for you to choose from.
Filter and textures done.
All the textures are done, now all that is left is scripting.
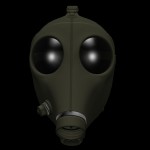
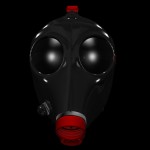
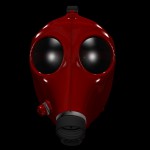
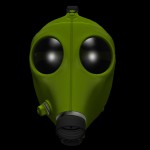
And here are the obligatory pictures 🙂
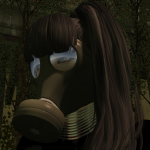
Where are we at?
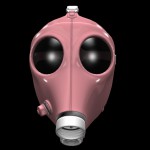
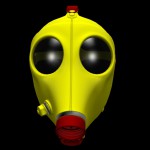
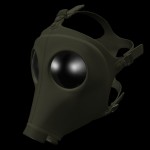
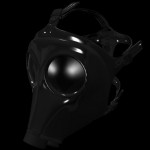
I’m finally done with the textures, everything has been rendered, I have working normal maps, I accented the mask by adding a metal finish to the sort of metal … strips that are used to hold it together. It has all my standard colors, in latex-like polish and in matte rubber, plus a “military” olive rubber.
What next:
- Finishing up the filter and texturing it.
- Making sounds.
- Making scripts.
It’s getting there, I’ve worked on it on it everyday this week, good progress. It’s still feels excruciatingly slow ( Nearly a month on this project ) but that’s as fast as it will go :/
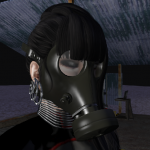
I have more pictures!
I spent two entire days fighting with bad normal maps and texture UVs, I must have packed the gas mask’s textures in a different configuration at least a dozen times over the past couple of days. I THINK this is the final iteration and the texture space should be used much more efficiently.
So yeah, I do have normal maps that work, somewhat, I also have my ambient occlusion maps done and started looking around for proper materials fit for a gas mask ( beyond the obvious latex). I kinda like the army style “olive” color.
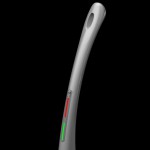
Closeup on the filter port filet, just because it’s a nice texture detail 🙂


