Archive for the ‘products’ Category
A few more pictures
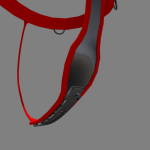
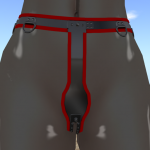
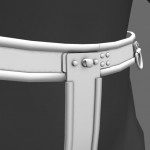
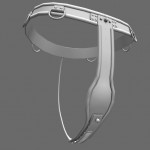
Here are a few more pictures for those out here who didn’t check the videos. Today I didn’t have much time so I finished and unwrapped the locking posts for the belt and the secondary shield.

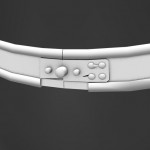
Most of the uvwmapping is done.
Well, almost, I need to pack everything and there is a couple of parts I still need to finish and unwrap. I’m keeping this for tomorrow.
Something different today: I’ve actually recorded it all, you can watch it on YouTube if you want to. Be aware that it is more than 4 hours long 🙂
Failure isn’t necessarly a waste.
I was planning on making some tests about breaking the symmetry of the model, maybe get a test version ready for SL.
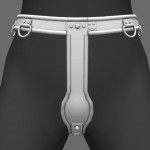
I spent a few hours merging the two mirrored sides, removing double vertices, moving the “closure seam” on the side and trimming the mending plate. I also increased the spacing of the secondary shield and added a couple more edges to the crotch part.
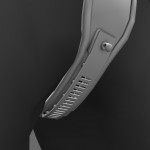
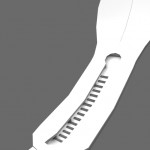
Everything was going well and then i decided to go back up my modifier stack to merge and simplify the D ring staples…
… bad idea, the second picture shows how the model started imploding because the two “layers” of modifiers do not play nice with each others.
I kinda knew this was going to happen, been modeling for a decade after all, but i was expcting it to be fixed.
All is not lost, it gives me a good idea of what I want to do and how to do it. I need to get some preliminary unwrapping done before, because I will not be able to do it cleanly (or quickly) once the belt is curved in place.
Details wise, still need to drill the holes into the locking posts so they look all right without a padlock on.
Electricity wise, I think the electrical box will simply ‘sit’ on the top of the secondary shield, after the locking post, I don’t need to worry about this now, adding it is fairly easy.
Here is an idea for it though. If the secondary shield is unlocked, the electrical box can be opened with a click, inside will be controls: on/off and a little selector to pick the frequency it accepts (for the remote). When the secondary shield is locked, it will not accept clicks to open it. Maybe have an eject button inside to detach it?
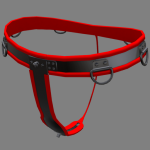
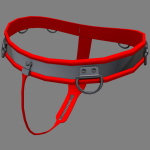
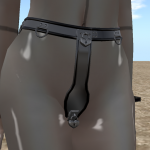
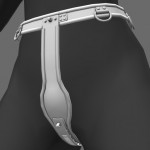
Chastity… progress!
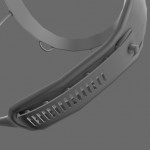
Secondary shield and side posts, I might move it a tad more away, locking post is in place aswell as a support “block” for it.
Slits look pretty nice in my opinion 🙂
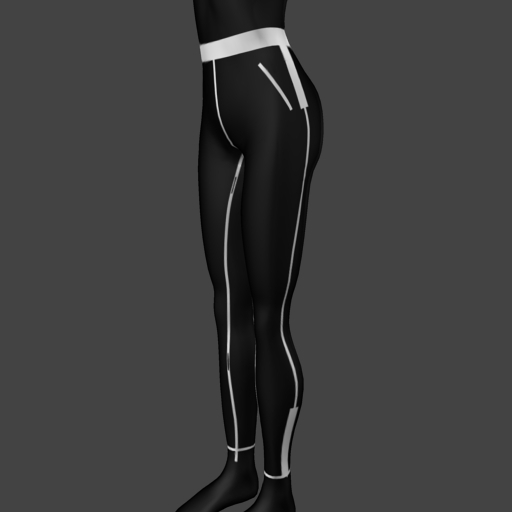
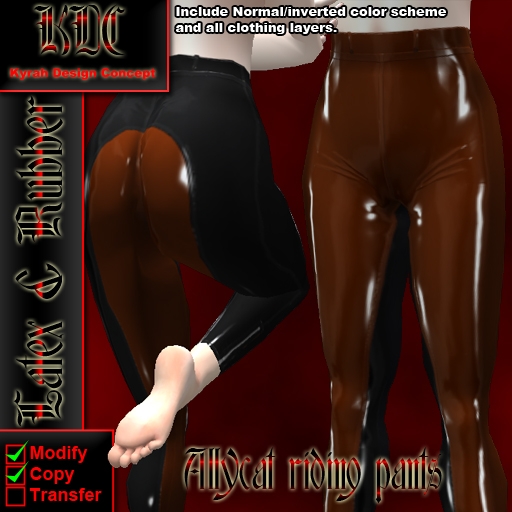
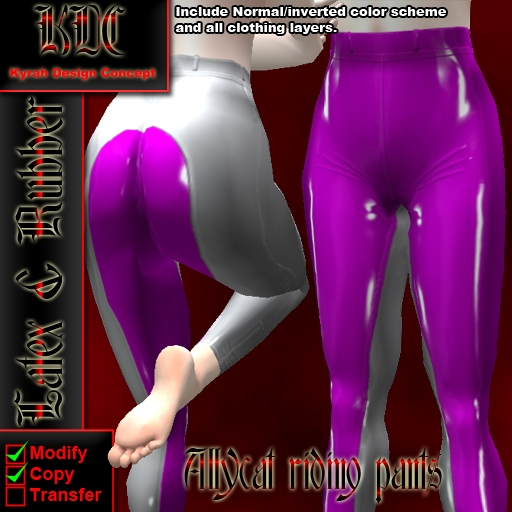
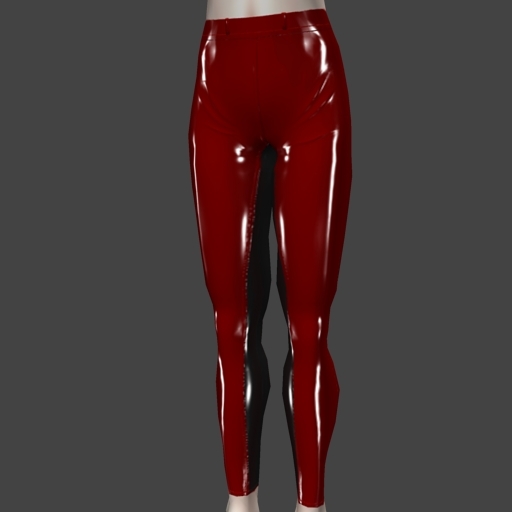
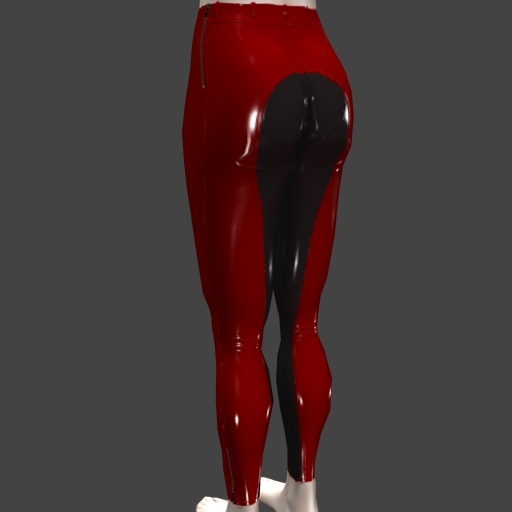
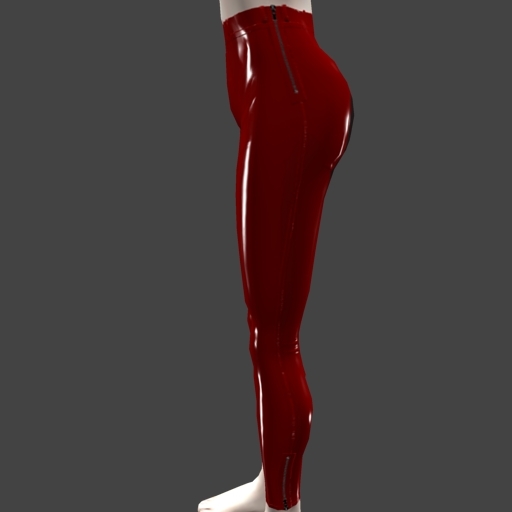
Released! Allycat latex riding pants
It’s done, using a similar technique as what i used to make the new latex catsuits and hoods, seamed and creased. The style is reminiscent of Jodhpur/riding breeches, zipped from the left side and on both legs.
All layers as usual, and you get two color schemes for the price of one 🙂
And for this one I added a few more color combos with white!

Quick update
Textures where re rendered twice (due to a glitch), composed in photoshop with highlights and ambient occlusion, uploaded and applied to the sl garments, product pictures for all the colors were taken and the sales panel is done. I’m really tired, believe it or not.
I still have to box it all up and then, finally, release time.
But this is for tomorrow, just a little more patience 🙂
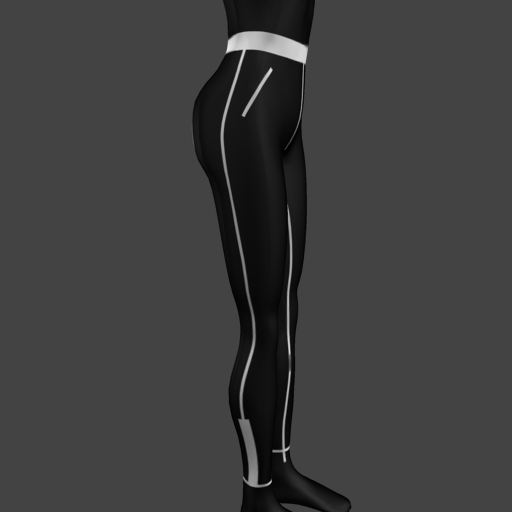
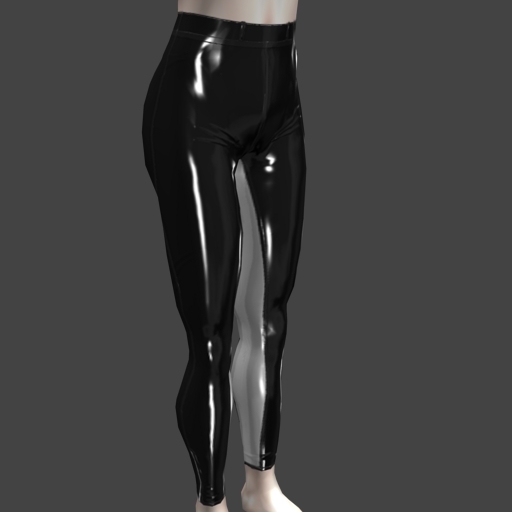
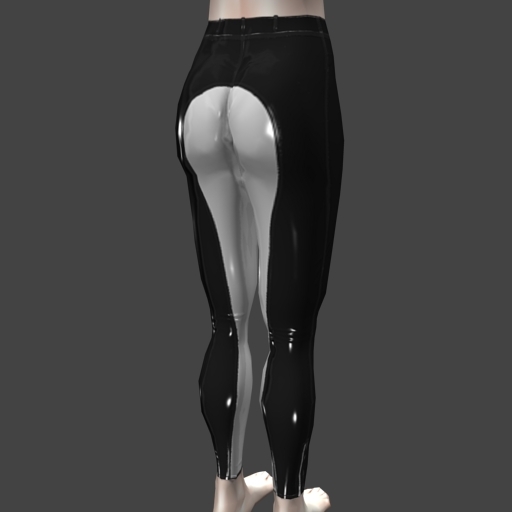
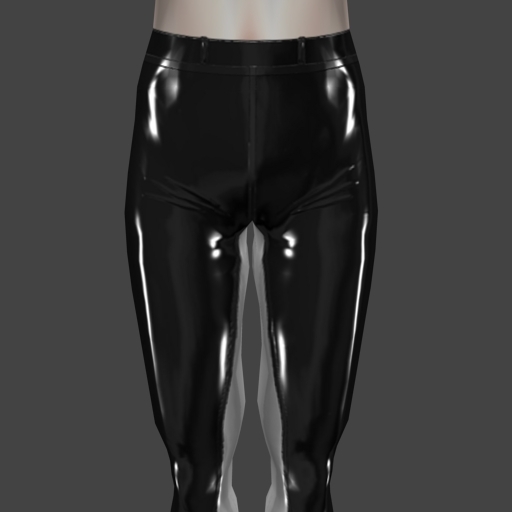
Riding pants: almost done
I believe this is my final iteration for the latex riding pants, everything is pretty much in place and the creasing looks satisfying ( To me and to Shigeko, who spent a LOT of time steering this project around ).
Here are a few screenshots of last night’s rendering. These will be available in dual color, as usual, but I think I will put one color pair, and its matching opposite in the same box instead of selling them separately. I might also do a few “special” colors, such as white/red and a couple of others, maybe sell a “pick your color” box, where you can basically IM me and tell me which colors you want.
It appears that I get a lot more comments on the bondage products than on the clothes… should I take this as a hint?
Latex rider wear almost there!
I’m almost done fiddling with those pants, added some extra details and creases, I might tweak them a little more tomorrow, but I think we are at a point where I can “almost” consider it ready for final rendering,I’ve removed the pockets because it just didn’t look right.
It doesn’t look like much
Added some zips and pockets, thanks to Shigeko’s wise suggestions, and I have rebuilt the bump maps (those will be final hopefully) . Next step is to add some loops and studs here and there 🙂