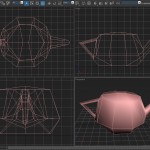
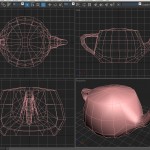
Sculpted prims
 Warning:
This tutorial is NOT for Peoples who are beginners in 3D, or for Peoples that never touched 3DsMax before, i will assume that you have a good understanding of the basic LPM tools and that you know general terms used in 3D, i repeat, this is NOT a level zero tutorial!
Preparation:
You will need the following tools:
-3dsMax 9 or higher
-SculptgenMax
I won’t go over the installation of those tools but it’s all you will need.
Initial setup:
- ( Rendering > Render > Common Tab > Assign Renderer > Production > mental ray renderer )
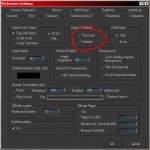
- By default, Max is set up to make nice renders and has a built-in Color correction system, this is bad and will make your sculptmaps suck, you need to deactivate it.
( Customise > Preferences > Rendering > Output Dithering – uncheck both options ).
Decide what you want to do:
 This step is entirely up to you. You SHOULD make yourself a reference object of what you are trying to create, take it a sketch, for those that ever worked with normal mapping/baking this means you probably might want to make your High resolution/high details mesh.
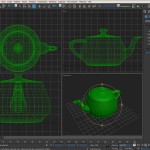
For the purpose of this tutorial i will be using the 3dsMax Teapot, i suggest it as a training subject.
Decide which sculpt map type you plan to use:
Scultp maps can be stitched in 4 different ways (plane, sphere, cylinder, torus) , you must choose the one you feel will make your work easier.
Sphere and torus are quite annoying to use so i won’t cover them in this tutorial, keep in mind the type you choose now doesn’t have to be the one you will use in sl, keep simply in mind where they stitch together:
- Plane: no stitches
- Cylinder: left stitch to right
- Torus: left stitch to right, top stitch to bottom
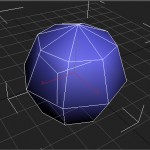
- Sphere: left stitch to right, top stitch in a single point, bottom stitch in a single point.
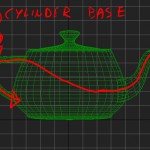 You also need to think how you are going to twist and lay the sculpt map for your object; for my teapot i decided to lay my cylinder shape flat, start at the spout, run down the body , shrink into the handle and curve it so it fold back in the body, this sort of tricks allow you to spare on prims/sculpts.
Setup: Starting with a plane:
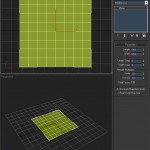
- In the create tab choose the Plane primitive and draw a plane, any size you wish, Length segment 8, Height segment 8.
- That’s about it, the plane should have automatically generated mapping coördinates, add an edit poly modifier and you are ready to go.
Setup: Starting with a cylinder:
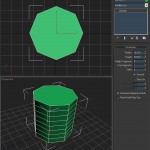
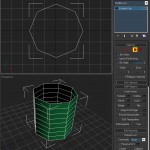
- In the create tab choose the Cylinder primitive and draw a Cylinder, Sides 8, Height segment 8.
- Add and edit poly modifier and delete the top and bottom cap.
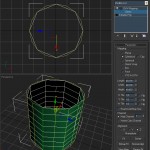
- Add a UVWmap modifier set the type to cylinder, click fit, it should work, you might want to check where the GREEN line is , that’s where the cylinder will be stitched closed.
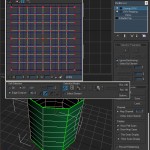
- Add an Unwrap UVW modifier click edit and check that the texture map is nice and flat.
- Add an edit poly modifier and you are ready to go.
Before modeling: a word about LODs:
In this tutorial the way we are modeling is fairly simple, we are starting from the lowest LOD and moving up to the most detailed LOD.
LOD Stands for Level of details, the lowest lod will be the crudest look of our model, while the highest will be what we can see when we are nice and close. Because the lower the LOD, the cruder the look , it’s important that we keep thinking about our model in term of how noticeable the lod change will be. In most games, the different LODs are actually separate models, or variations of the same model. When we work with sculpted prims we don’t have this kind of luxury, when we go down one lod we loose all the EVEN vertices of the model.
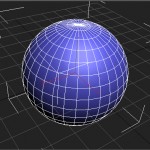
LOD 0 we have 32×32 1024 vertices
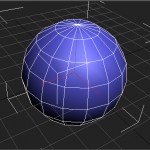
LOD 1 we have 16×16 256 vertices
It is important in order to make a good sculpted map to keep the shape of the object as consistent as possible between each LOD, ideally, when modeling from 8×8 to 16×16, you should NOT move the already placed points (all the odd lines).
Modeling: LOD2, 8×8
Now that we have our 8×8 grid, whatever the base shape you decided to use we need to start wrapping our reference mesh with this cage. Of course we COULD use an automatic tool like conform to speed-up the process but doing it by hand allows you to put the accent on the details that you want to come out.
You need to foresee how you are doing your object, where are the hard edges that define the shape and which should be defined, if you plan to add labels or a detailed surface at a certain place, you need to give them more room on the future texture map, wich means the mesh will be more dense at this place.
- You need to think both in texture surface allocation and in mesh details as your sculpt map and texture map coördinates will be the same.
- It’s very important that even at LOD2 your object’s shape is mostly defined, this is the lod Peoples will see from a distance and when the object is rezzing so it has to look like what it is supposed to be, even if it is blocky.
- This mesh is the base of your sculpted prim and should not be modified in the next LOD so try to make it final (you can if you know what you are doing but you should try to avoid it when you can) .
Going from lod to lod:
Tesselate
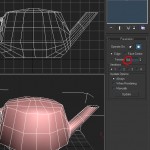
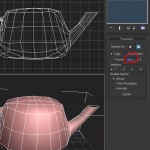 Personally i use two ways to go from lod to lod, the first one is to add a tesselate modifier. (iteration 1,operation mode on quads, and not triangles). This will turn your 8×8 grid in 16×16 , and likewise, 16×16 in 32×32, but it has a few side effects.
First, it will try to guesstimate the position of the new points, but you can turn this off by setting the Tension to 0.
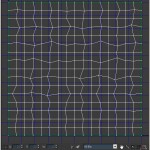 The problem with tesselate is that it will lightly mess up your texture map, the only way i found to fix this is to add an unwrap uvw modifier and move all the even points back in place (having a checker texture at 16×16 and 32×32 may be useful here)
TurboSmooth
The second method is to use a “turbosmooth” modifier, iteration 1. The main inconvenient is that it is going to smooth the whole mesh, depending of your mesh you might be able to disable it. The advantage over the “tesselate” modifier is that it won’t touch your texture map.
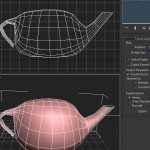
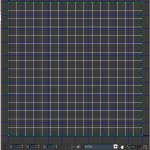
Bottom line: use what works for you.
Modeling: LOD1, 16×16
Now that we have 4 time as many point, it’s time to rectify the position of the new points, at this step you can start detailing the trims edges and whatever that you have planned to create. This is the lod most Peoples will see most of the time, so try hard to make it look decent.
Remember, do NOT touch the points that got placed in LOD2 unless you know what you are doing.
Once you are satisfied with the look of your mesh, check a last time the UVW map and go ahead to lod 0.
Modeling: LOD0, 32×32
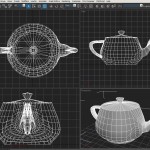 Depending of your mesh or your laziness you can eventually get away with making a simple turbosmooth in place of a manual adjustment.
Otherwise, do the same as for LOD1, this lod most Peoples do not see unless they are up close.
I’m done with torture, now what:
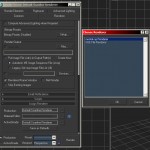
Well now you can use sculptgenmax to generate your scultmap from this nice mesh you just created. I suggest to stick to the 64×64 size, it’s twice as big as it should but it allow for a little room for errors. Try the proportional and non proportional mode, sometimes one look better than the other.
A word about uploading:
For uploading my sculptmaps i tend to use a little tool called “SLImageUpload” It SEEMS to make a better job than the SL client for uploading lossless textures, but maybe it’s just a coincidence.
To be done:
- Write about the texturing.
